We use cookies to make your experience better. To comply with the EU GDPR e-Privacy directive, we need to ask for your consent to set cookies. Learn more.
Make a Dog Bed - How to DIY
25
Apr
Another idea aimed to our little friends! If you have plenty of leftover wood planks you can easily make a dog bed. Something that will stand out, keep things clean and tidy and add character to your home.
We researched quite a while for this and we found this tutorial by Dona at Crafted Niche who came up with the idea of making a unique (and quite stylish we'd say) dog bed!
Things you'll need to make a dog bed:
- 5 to 6 planks of leftover wood floor. Depending on width and length you will be cutting these down to size
- Hand or circle saw
- PVA Wood Adhesive
- Ruler and pencil
- Sandpaper
- Spray-paint with colour of your choosing (Look for paints that do not contain lead, zinc or chromate and are animal or infant friendly)
- Clamp
- Hammer and nails
- Clamp (to keep the pieces together as you join them)
- A big fluffy pillow or two!
- Optional
- Hand planner or chisel if you feel like carving patterns or adding bevels to your bed
- Brush and paint to write your cute friend's name
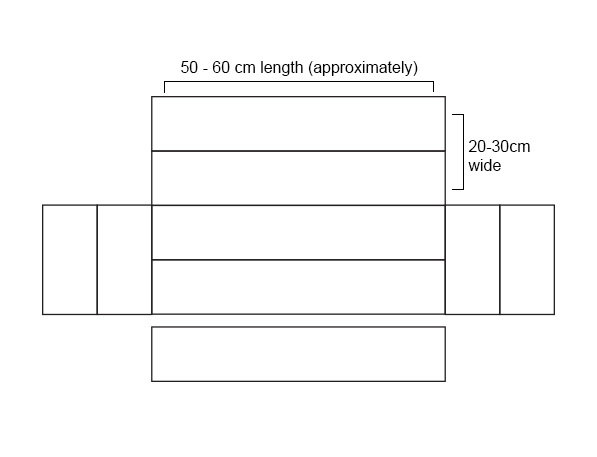
Considering your wood floor planks are of average width, we are going to need in total 9 parts to make a dog bed.
These are:
- Two long planks for the back
- Two long planks for the bottom (base) of the bed
- One long plank for the front (entrance)
- We will also need two long planks cut down to size for the sides. Making four smaller planks.
Here is a diagram to help you get an idea of our design. The sizes are approximate depending on your pet size and how big or deep you want the bed to be.
Step 1:
Cut down the planks to size. As mentioned you're going to need 5 long planks for the main body and 2 for the sides.
Make sure all the 5 long ones are the same length.
Cut the other 2 in half or approximately to 20-30cm length.
Note: Depending on the size of your pet you might want those bigger or smaller.
Step 2:
Glue the longer boards together in sets of two in the same manner you would lay your floor. PVA Adhesive on one side and "click" them together, holding them steady until the glue sets. One couple for the base of the bed and one couple for the back.
Do the same for the (now) 4 shorter ones in sets of two.
You should end up with 2 glued couples of long boards, 2 glued couples of short boards and a single full length plank.
Step 3:
Nail the box together.
- Attach the two bigger parts in a 90° angle and nail them together (some glue helps as well). This will be our back and base of the bed.
- Glue and nail the single long board on the front of the base
You should now have something resembling this:
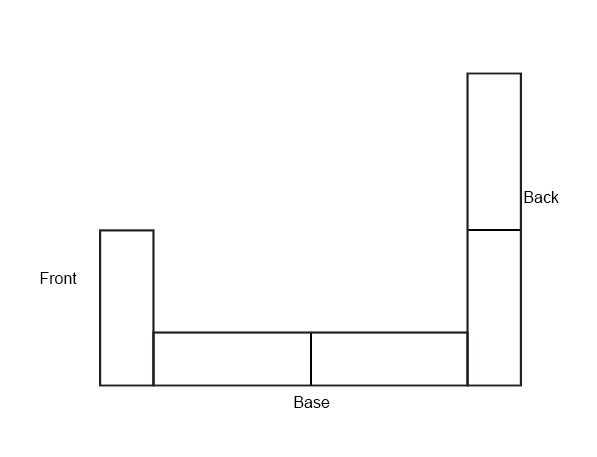
- Finally, glue and nail the sides on to the main "body" of the bed
Here is a picture from Dona's own progress on the DIY dog bed (made with wood planks not flooring!)
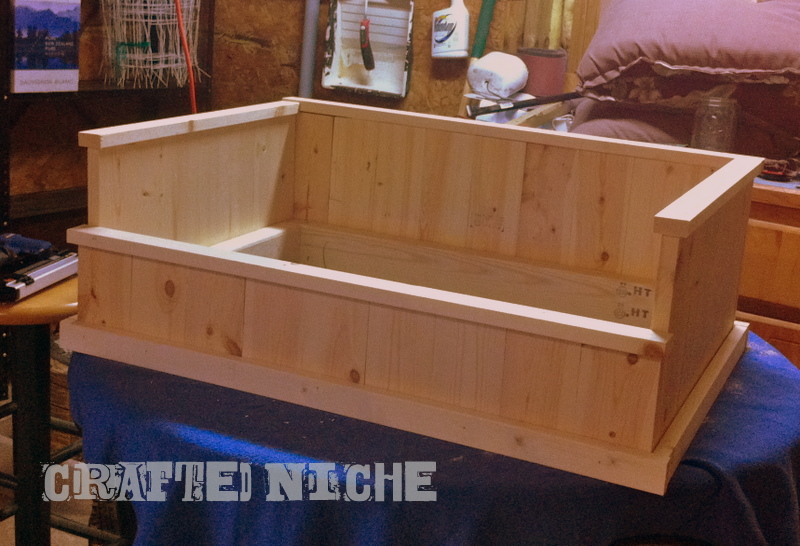 Dog bed by Dona at Crafted Niche
Step 4:
Sand the edges and make sure for an even surface on all sides. If you want to bevel or carve some patterns on your little dog bed now it's a good time to do so.
Step 5:
Add some style! Now it's time for the fun part. Spray paint your bed as you wish. You can also make a paper cutout with your little friend's name and paint the front of the dog bed with it for a more personalized approach.
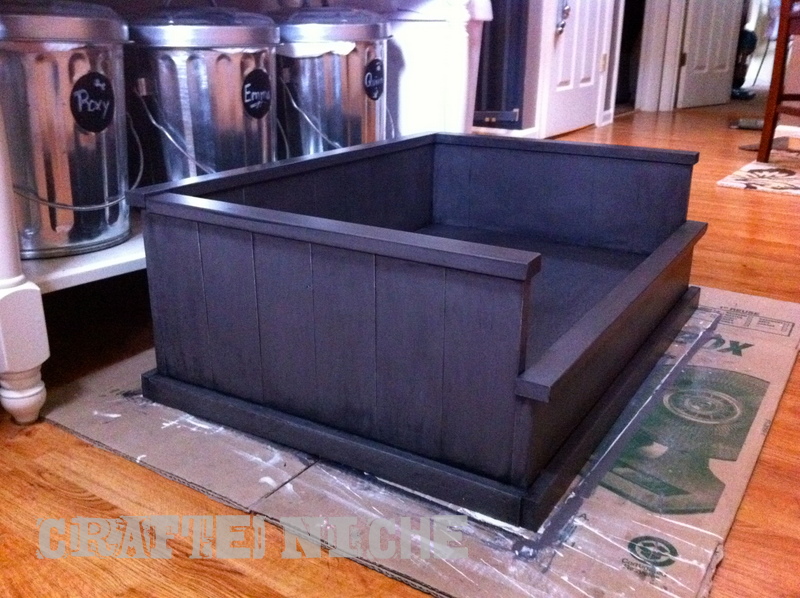 Finished doggy bed by Dona @ Crafted Niche
Voila! Your doggy/kitty bed is done!
We will finish by showing you Dona's adorable dog and its new bed!
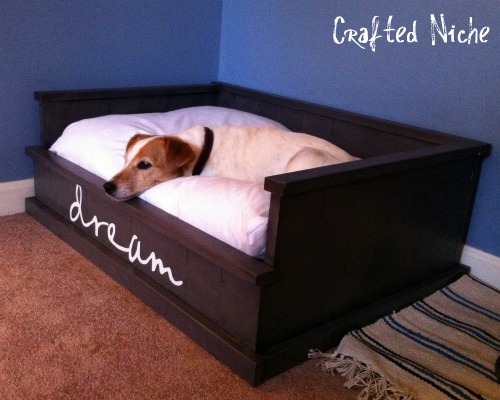 Dona's adorable puppy and her new bed!
