We use cookies to make your experience better. To comply with the EU GDPR e-Privacy directive, we need to ask for your consent to set cookies. Learn more.
How to Fit Engineered Flooring with Locking System
13
Mar
In this video tutorial, we show you the benefits of an engineered wood floor that employs the use of a locking system
Benefits of an engineered flooring with locking system
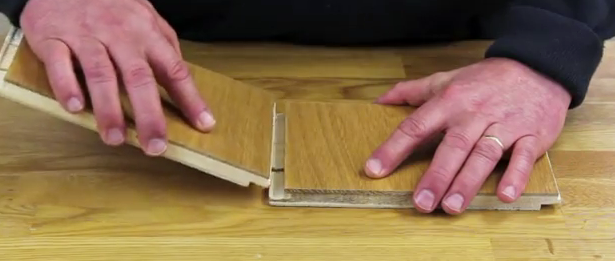 Image courtesy by: woodandbeyond.com
Engineered flooring with locking system is a relatively new product in the wood flooring market. As the name indicates, the planks used in its construction fit/lock together tightly with no need to be fixed with nails, glues or staples. This makes it the simplest and fastest installation method and through this video tutorial, you will be able to learn how to do it yourself with little or no experience at all.
The design of an engineered flooring with locking system is not only popular for its ease of installation. The fact that the boards are tightly snapped together, make it almost impossible for moisture or any type of liquid to penetrate and destroy the floor. This characteristic makes engineered flooring with locking system an ideal solution for kitchens and bathrooms, where the risk of moisture becomes higher.
Moreover an engineered flooring with locking system should always be installed using a floating method. Using the floating installation technique, you are able to install your flooring over any type of sub-floor and once it is installed, it will expand and contract as one unit. Just remember that you will need to leave an expansion gap around the perimeter of the room. As with all flooring installation techniques, it is essential that you use a quality underlay.
Another benefit of an engineered flooring with locking system, is that once fitted, you have the ability to unlock it and lift it up. This is really important for areas that you might need access to the sub-floor.
Tools required for fitting an engineered flooring with locking system:
- Stanley knife
- Hammer
- Push bar
- Chop saw
- Pencil
- Crow bar
